Making a Character Mesh.
Dev Diary #17
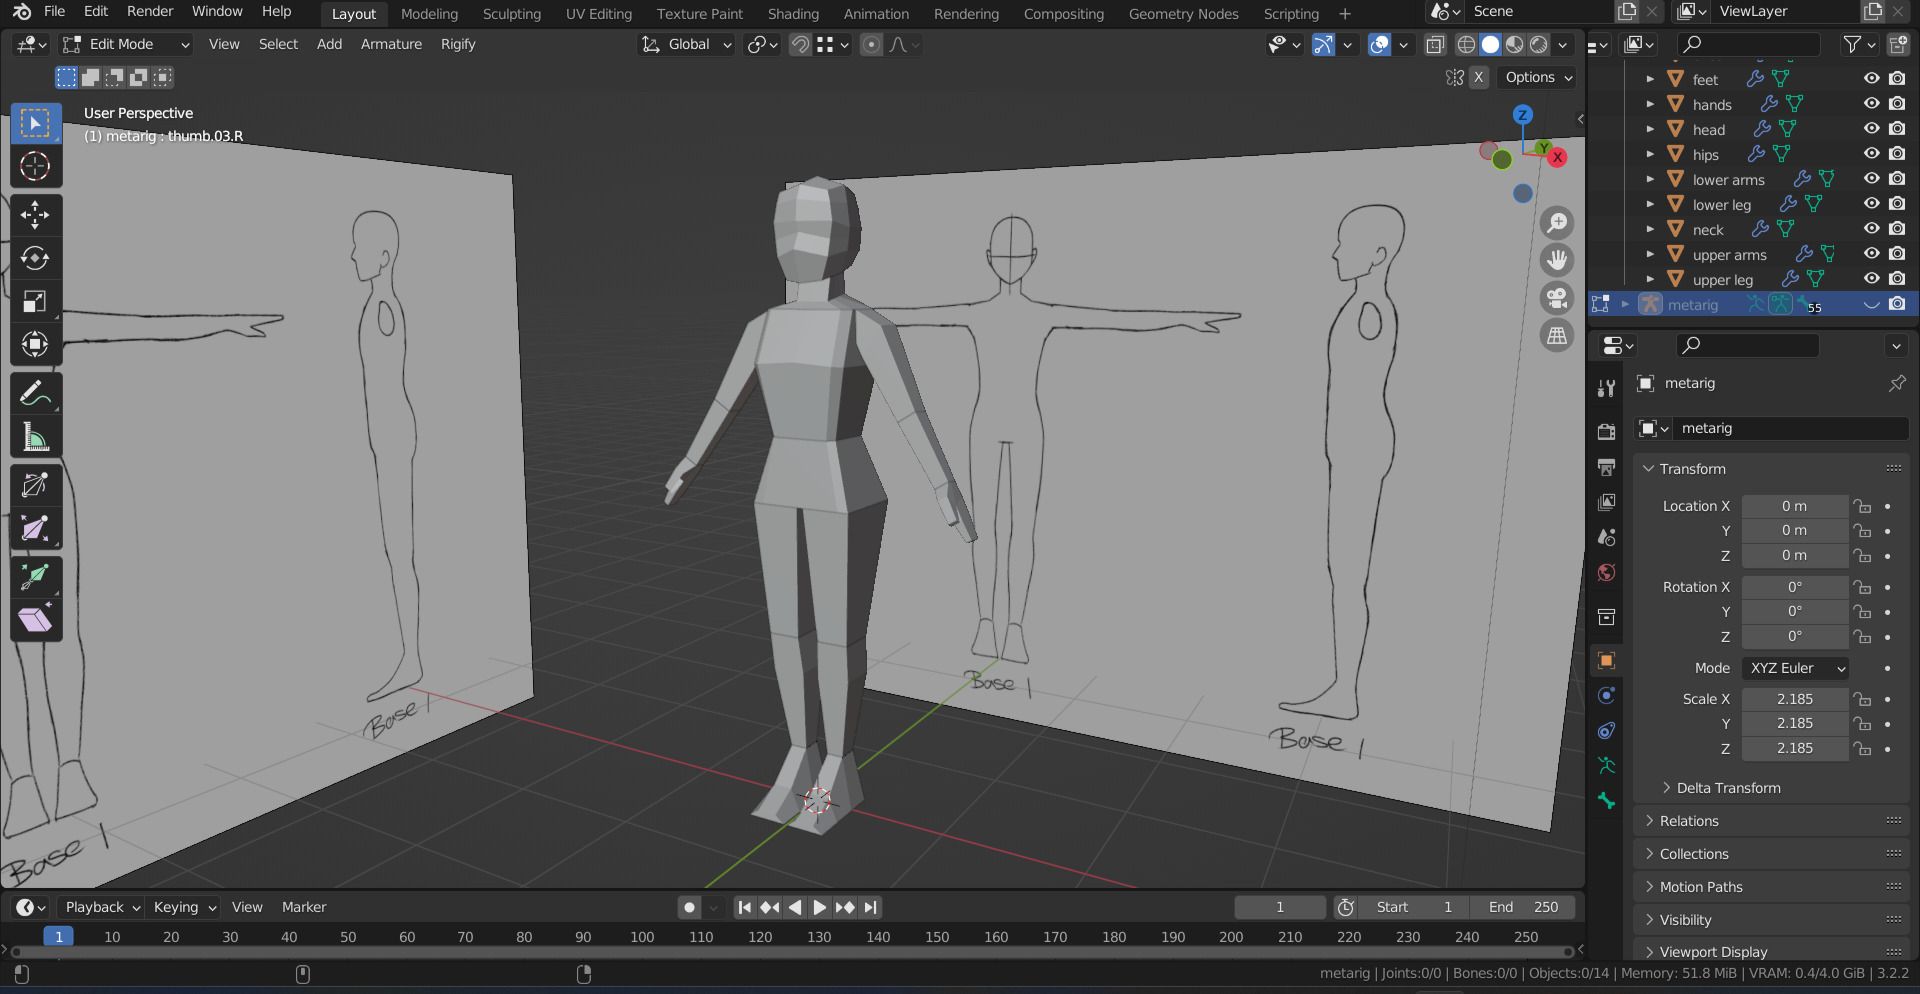
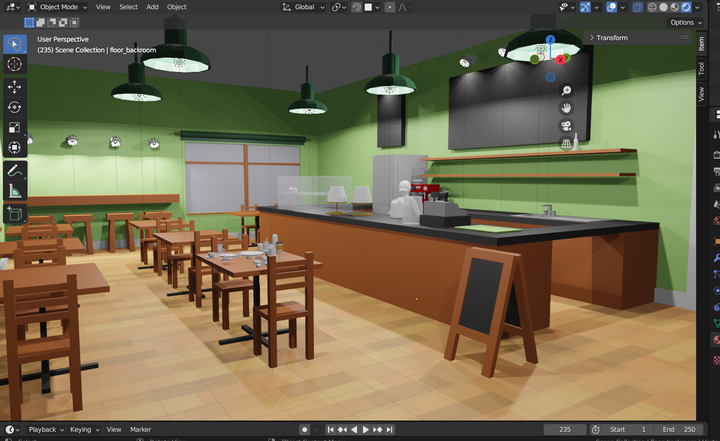
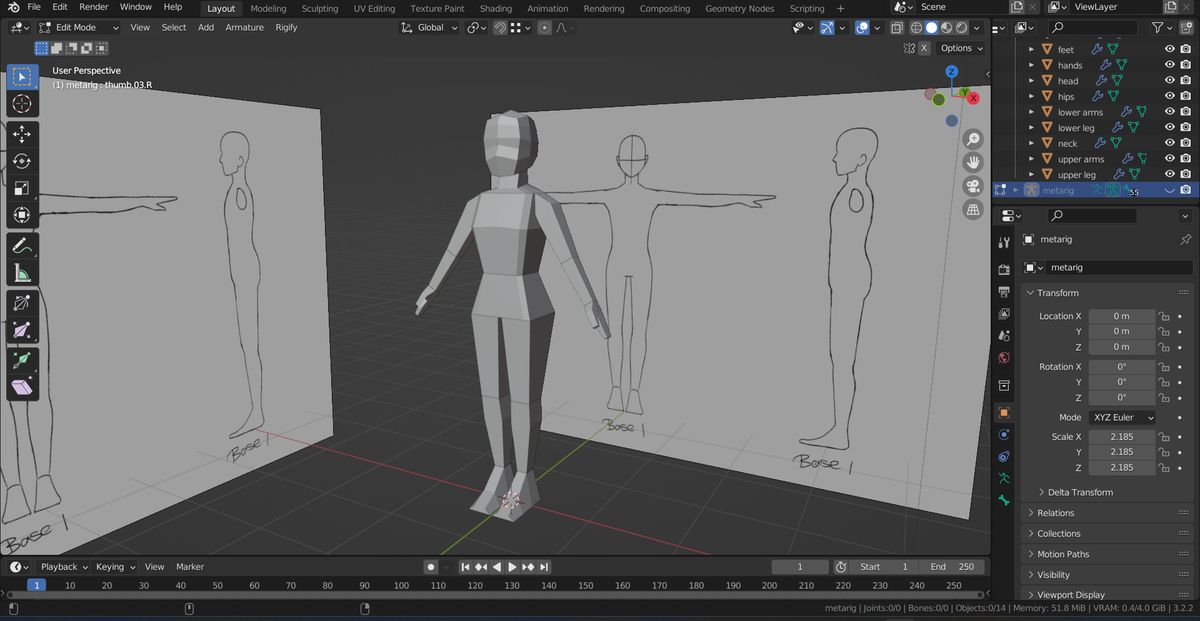
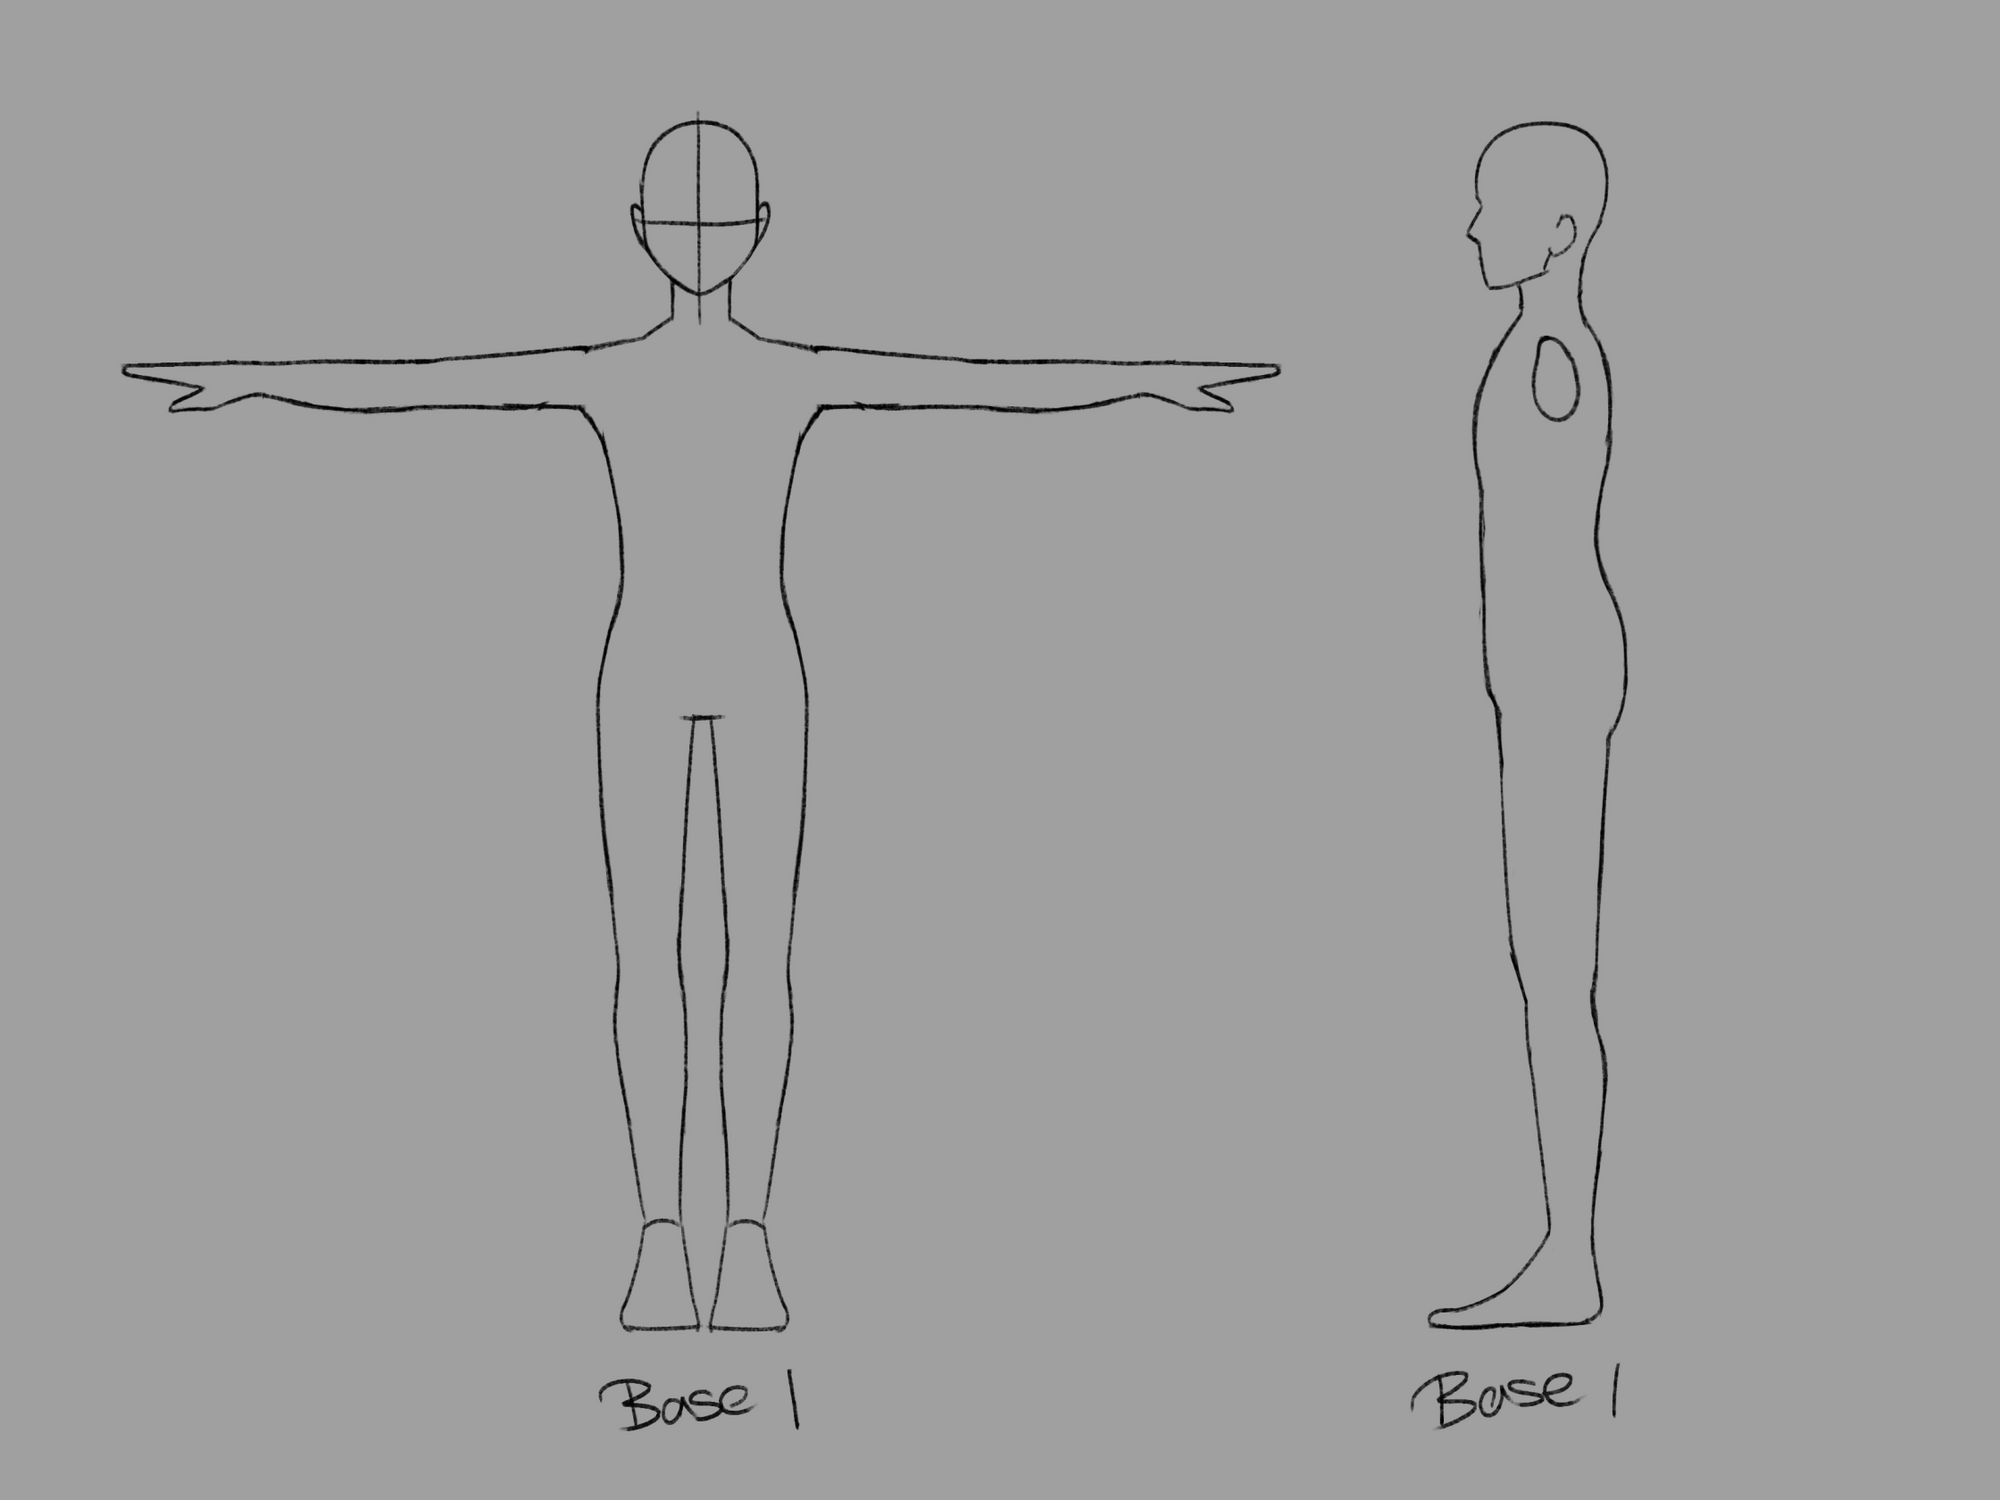
After discussing the character art style we wanted with my group, I decided to start developing and creating a mesh for the enemy characters! I decided that instead of creating each enemy mesh and animating them seperately, I would create one basic human mesh, rig and animate it, and then apply it to each enemy character I create to save on time. Before I could begin to actually model the characters though, I figured I'd need a reference for the anatomy/ silhouette of the characters I was about to create. To do this, I used Clip Studio Paint to draw out a basic human in both a front and side view to import into Blender and model the character from.
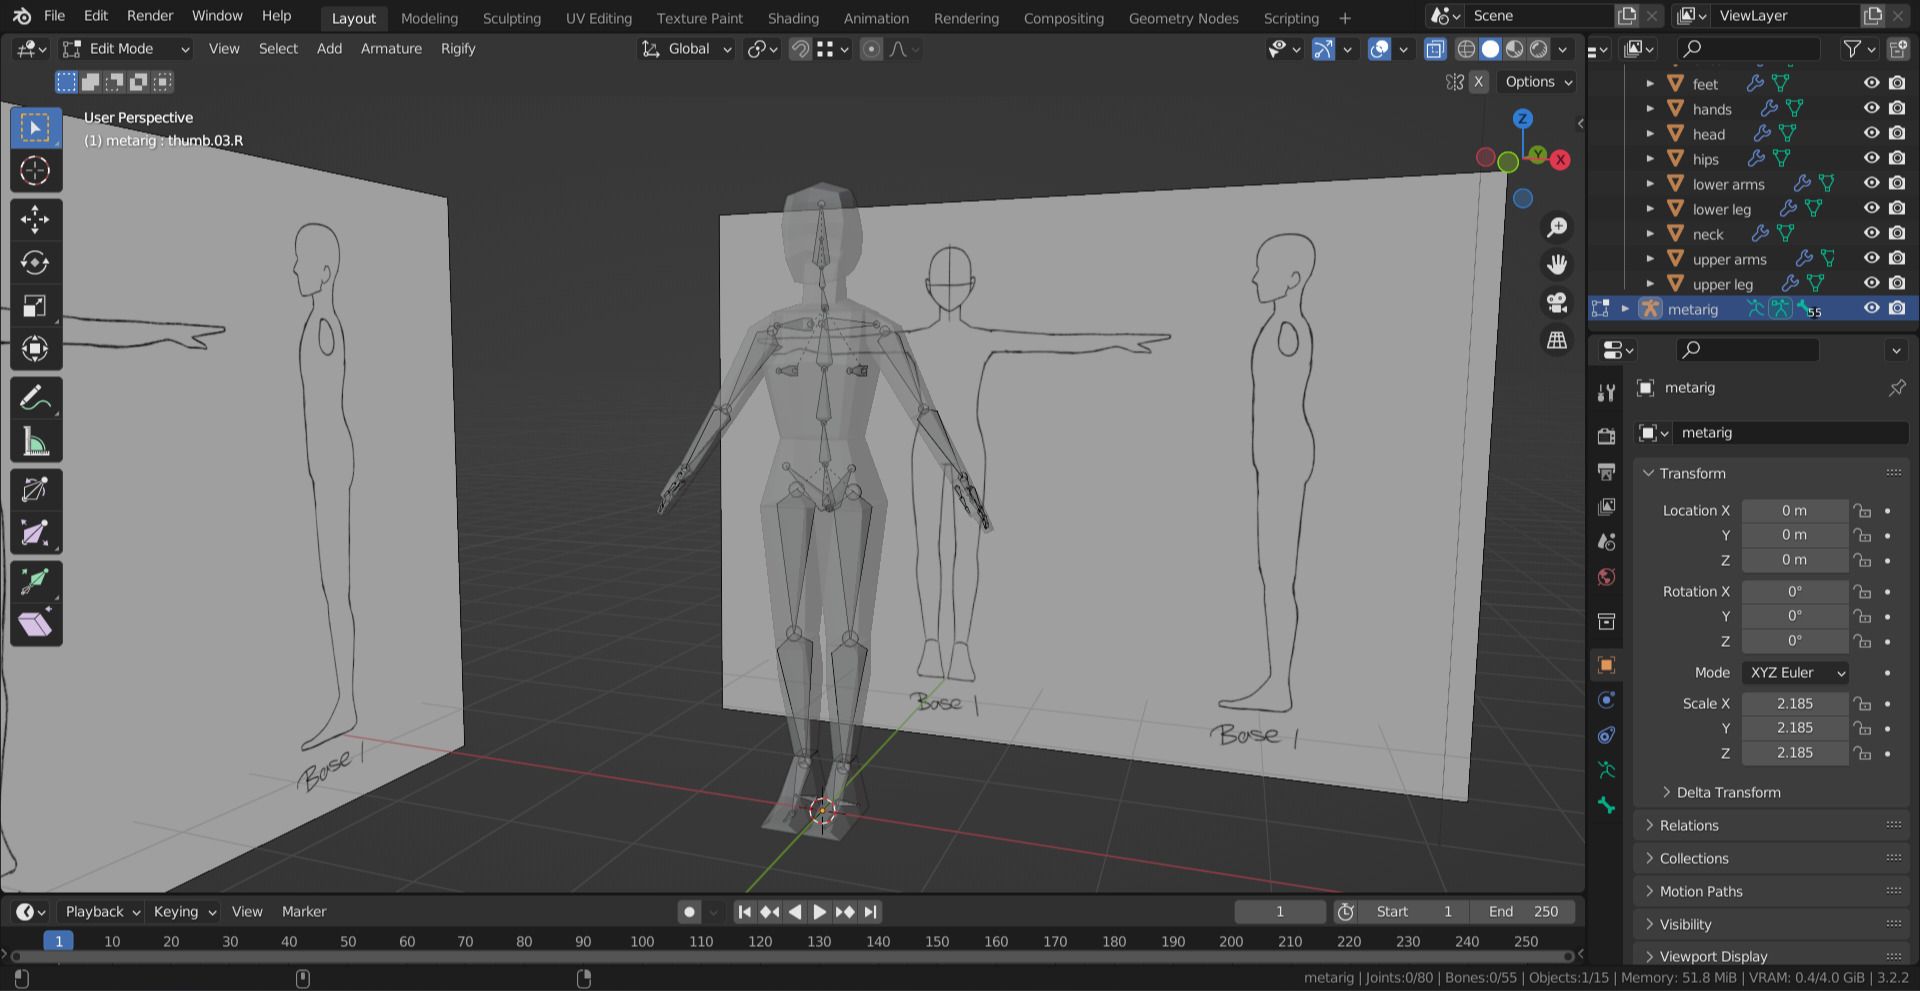
After feeling satisfied with the reference, I started modeling the character. Using tools such as extrude, mirror, move, rotate and scale, I modeled the character from a single cube however I was unhappy with the results as I felt it looked too square and unnatural, especially the head. After doing some additional research into low poly character modeling, particularly in a PS1 or N64 style, I learnt that characters from back then would sometimes be modeled limb by limb instead of one joined mesh to avoid clipping caused by weight painting when rigging to animate. After learning this, I decided to give creating the enemy mesh another go but this time, creating it by individual limbs. I found this method more effective as I felt it gave me more control for moving and adjusting parts of the mesh. Additionally, I felt that parts like the neck and head looked more natural despite still being low-poly. After completing the mesh, I used a Blender add-on to import a human armature and went about adjusting it to rig the model.